React Drag and Drop Without Library
Posted Dec 24, 2022
Welcome to the #react10 Day 7 challenge.
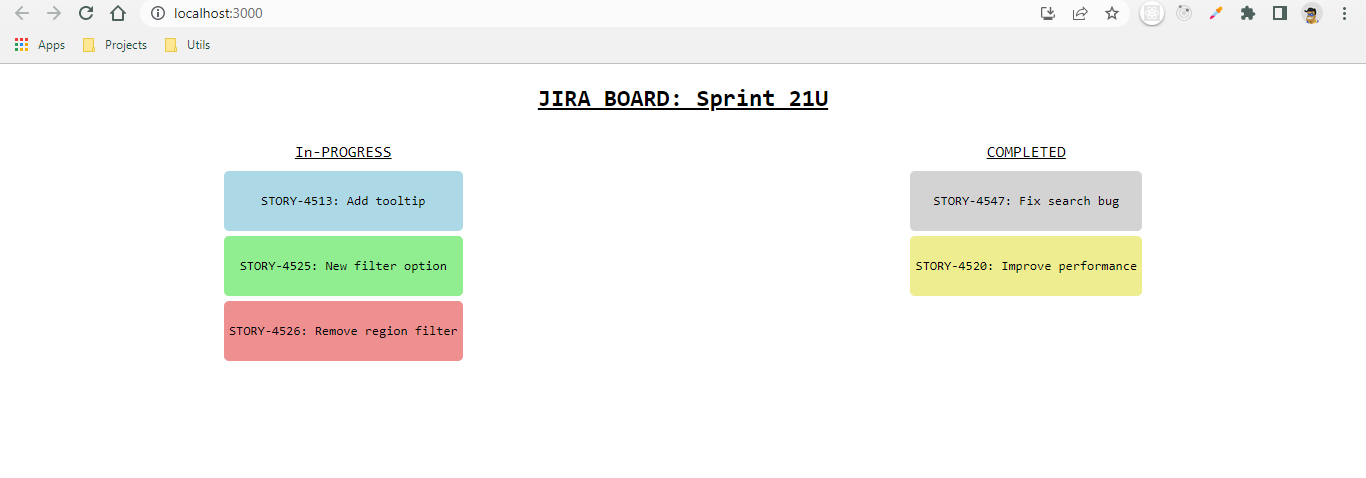
In this challenge we will develop a react drag and drop similar to JIRA board without any external library.
You will learn how to make a html element draggable and how to make a div to catch that draggable element.
JS events used in this challenge are onDragOver, onDrop, onDragStart.
Demo
Drag and Drop in ReactJs GitHub code
Pre-requisites
- Code Editor (like VS Code)
- React basic knowledge
- Basic knowledge of HTML & CSS
Lets Begin!
Open terminal in the vs code and run these commands,
npx create-react-app drag-drop
cd drag-drop
npm start
After doing all of this, your UI should look like,
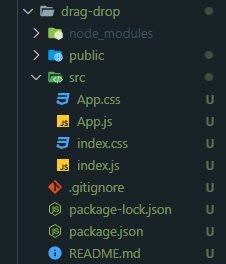
Folder Structure
Note - I have removed few files which 'create-react-app' util gives us by default.
You can also remove those but that is not mandatory step for this challenge.

Lets add some code
For better understanding, I have added few comments in the code itself.
App.js
import { useState } from "react";
import "./App.css";

function App() {
  //state with default data
  const [tasks, setTasks] = useState([
    { name: "STORY-4513: Add tooltip", category: "wip", bgcolor: "lightblue" },
    {
      name: "STORY-4547: Fix search bug",
      category: "wip",
      bgcolor: "lightgrey",
    },
    {
      name: "STORY-4525: New filter option",
      category: "complete",
      bgcolor: "lightgreen",
    },
    {
      name: "STORY-4526: Remove region filter",
      category: "complete",
      bgcolor: "#ee9090",
    },
    {
      name: "STORY-4520: Improve performance",
      category: "complete",
      bgcolor: "#eeed90",
    },
  ]);

  //this event is for the dragged task card.
  //this is required to save unique id in the dom event so that when we drop it we would know the card id
  const onDragStart = (event, id) => {
    event.dataTransfer.setData("id", id);
  };

  //fetches the card id and based on that update the status/category of that card in tasks state
  const onDrop = (event, cat) => {
    let id = event.dataTransfer.getData("id");
    let newTasks = tasks.filter((task) => {
      if (task.name == id) {
        task.category = cat;
      }
      return task;
    });

    setTasks([...newTasks]);
  };

  //method to filter tasks beased on their status
  const getTask = () => {
    const tasksToRender = {
      wip: [],
      complete: [],
    };

    //this div is the task card which is 'draggable' and calls onDragStart method
    //when we drag it
    tasks.forEach((t) => {
      tasksToRender[t.category].push(
        <div
          key={t.name}
          onDragStart={(e) => onDragStart(e, t.name)}
          draggable
          className="task-card"
          style={{ backgroundColor: t.bgcolor }}
        >
          {t.name}
        </div>
      );
    });

    return tasksToRender;
  };

  return (
    <div className="drag-drop-container">
      <h2 className="drag-drop-header">JIRA BOARD: Sprint 21U</h2>
      <div className="drag-drop-board">
        <div
          className="wip"
          onDragOver={(e) => e.preventDefault()}
          onDrop={(e) => {
            onDrop(e, "wip");
          }}
        >
          <div className="task-header">In-PROGRESS</div>
          {getTask().wip}
        </div>
        <div
          onDragOver={(e) => e.preventDefault()}
          onDrop={(e) => onDrop(e, "complete")}
        >
          <div className="task-header">COMPLETED</div>
          {getTask().complete}
        </div>
      </div>
    </div>
  );
}

export default App;
App.css
.drag-drop-container {
  text-align: center;
  font-family: monospace;
}

.drag-drop-board {
  display: flex;
  justify-content: space-around;
}

.drag-drop-header {
  text-decoration-line: underline;
  font-size: 1.5rem;
}

.task-header {
  margin: 10px;
  text-decoration: underline;
  font-size: 1rem;
}

.task-card {
  height: 50px;
  border-radius: 5px;
  display: flex;
  align-items: center;
  justify-content: center;
  margin: 5px;
  padding: 5px;
}
And that's it! You have created your own react drag and drop component without any library.
Final UI

Enjoy your App :)
Your feedback is our favorite notification! Share your thoughts about this page and make us smile.